Best HMO and Health Insurance for Freelancers in the Philippines
Compare the best HMO and health insurance plans for freelancers. Explore prepaid health cards, HMOs, medical insurance and critical illness cover.


If you’re working freelance in the Philippines, there’s a good chance you’re being paid in US dollars instead of PHP. However, receiving payments from US clients into a Philippine bank account can mean extra fees, as well as needing to keep hundreds of dollars in your account to meet minimum balance requirements. The Wise account can help.
This guide explains how to open a freelancer USD account so you can receive USD in the Philippines more easily, including how to get paid with no payment fee for ACH transfers.
| Table of Contents |
|---|
Sign up for a free account now
The Wise account is a multi-currency account that supports 40+ currencies. It lets you:
You can also generate local account details for 8+ currencies, including USD. This means you can receive payments in US dollars without needing to convert them back to PHP right away.
You can also receive payments in other supported currencies using local account details, depending on availability in your region.
Once you’ve set up your Wise account, you can unlock local account details for USD and any other supported currencies you need. You can then share these details with the person sending you money.
If you have a client in the US, you can give them:
This allows them to make a local ACH payment - treated as a domestic transfer for them, which is often cheap or free. There’s also no fee for you to receive the money into Wise.
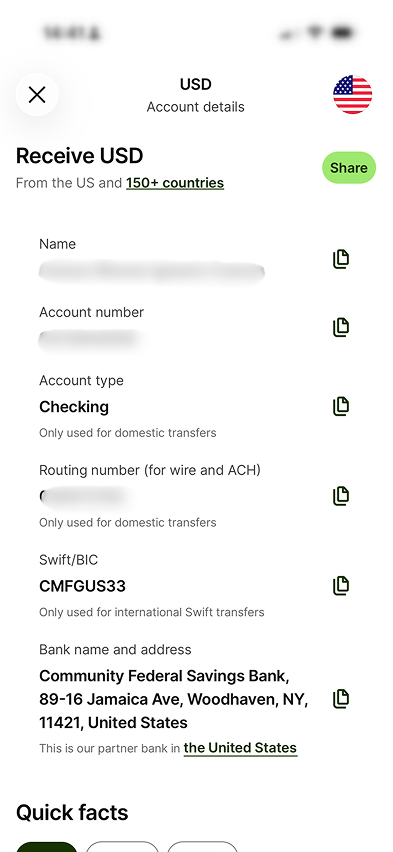
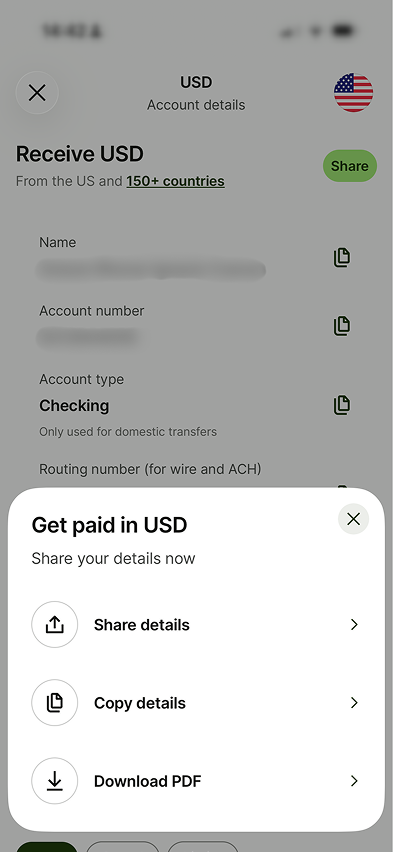
Example of USD account details you can share with clients, including account and routing numbers.
You can open your freelancer USD account with Wise using just your phone, a local ID, and proof of address in the Philippines.
Once your account is set up, you can find your Wise USD account details and easily share them with clients who need to pay you. You can copy the details directly from your account to include in:
Your client can then pay you just like they would pay someone based in the US. You’ll receive the money in USD, and can choose to:
Conversions use the mid-market exchange rate with low, transparent fees.
You can also:
Once you’ve converted your balance to PHP, you can send it to a local bank like BDO or BPI or an e-wallet like GCash
You can also use your freelancer USD account to track your income more easily. Wise provides downloadable statements and transaction histories, which can help you stay organised and make reporting income to the BIR more straightforward.
Ready to get started with your freelancer USD account? Here’s how to open a Wise account and get set up to receive, convert and spend your incoming USD.
As a freelancer in the Philippines, you can open a personal Wise account with no upfront fee. This allows you to receive, hold, send, spend, and exchange multiple currencies in one place.
To open your Wise account:
Your account will then be verified. This can happen instantly, or it may take a day or two. Verification is required to comply with regulations and keep your account secure.
Once you have your Wise account open you can open a USD balance and get your local USD account information including an account number and routing number. Here’s what to do:
Add a new currency, like USD, directly from your Wise account.

Select USD to open a balance and start receiving payments.
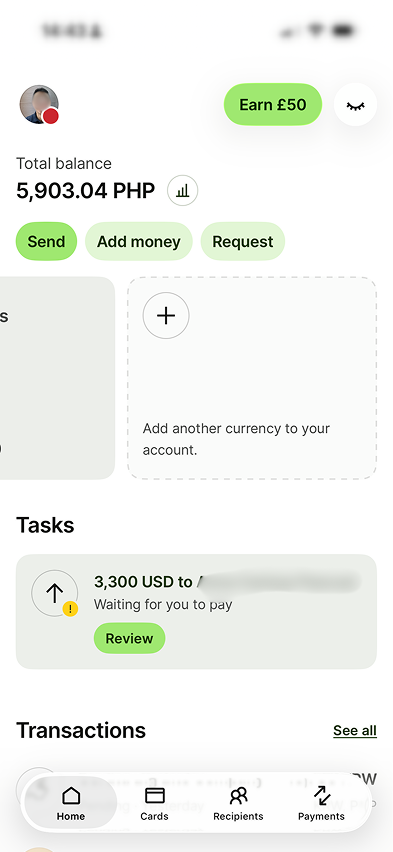
Your account will be verified and then your balance in USD is opened. The USD balance will be shown in your account home page, and you can then tap it to get your USD account details.
In the Wise app, you’ll find an option to share your USD account details. You can:
You can include these details on your invoice or send them directly to your client. They can then set up the payment just as they would for someone based in the US.
Share your account details instantly via app, email, or downloadable PDF.
Once you have a USD balance you can hold it, convert it, use it for card spending or to send to someone else. You’ve got the option to convert to PHP instantly, or whenever you spot a good exchange rate, and you can use the Wise conversion tools to get rate alerts and automatic conversion when the rates are good.
Once you have PHP in your account you can transfer from Wise to GCash, or make a payment from Wise to an account at a bank like BDO or BPI. Here’s how:
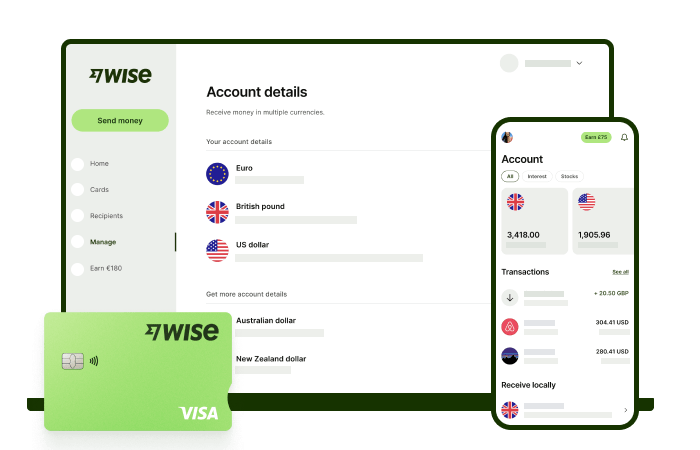
Freelancing means you can work with clients all over the world, for flexibility and to increase the range of opportunities available. And with Wise you can also get paid in 8+ currencies with local account details and no Wise incoming transfer fee. That means your money is as flexible as you are, with easy ways to convert, hold, send or spend depending on your needs.
*Please see terms of use and product availability for your region or visit Wise fees and pricing for the most up to date pricing and fee information.
This publication is provided for general information purposes and does not constitute legal, tax or other professional advice from Wise Payments Limited or its subsidiaries and its affiliates, and it is not intended as a substitute for obtaining advice from a financial advisor or any other professional.
We make no representations, warranties or guarantees, whether expressed or implied, that the content in the publication is accurate, complete or up to date.
Compare the best HMO and health insurance plans for freelancers. Explore prepaid health cards, HMOs, medical insurance and critical illness cover.

Learn how to get a BIR Certificate of Registration (Form 2303) in 2026, including requirements, steps, and how to apply online.

Searching for the best laptop for a virtual assistants? Our guide covers top specs, brands, and budget options to boost your WFH productivity.

Ready for a non-voice WFH job? This guide covers roles (with salaries!), essential skills, where to find legitimate postings, and how to get paid.

Explore the types of virtual assistant work. Find your niche, from social media to data entry, and learn how to manage client payments easily.

Your guide to landing direct client virtual assistant jobs from the Philippines. Learn where to find clients, build your portfolio, and get paid easily.